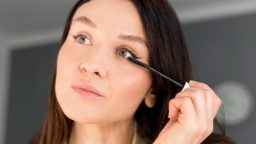
Highlighting is one of the most popular makeup techniques to enhance the structure and radiance of your face. It’s not just about placing a bit of shimmer on your cheekbones anymore—advanced highlighting techniques can take your makeup game to the next level, giving you a glowing, sculpted look. Whether you want to create a soft glow or a more intense, reflective shine, mastering advanced highlighting techniques will allow you to highlight your face like a pro. Here’s a guide to some of the best advanced techniques to help you get that perfect glow.
- Layering Highlighting Products
One of the most advanced techniques to achieving a radiant, multidimensional glow is layering your highlighter products. Layering different formulas—such as creams, liquids, and powders—can create a more intense, long-lasting effect. Here’s how to do it:
- Step 1: Start with a Cream or Liquid Highlighter
Apply a cream or liquid highlighter to the high points of your face. These products often give a natural, dewy finish and create a base layer of radiance. Focus on areas like the cheekbones, bridge of the nose, brow bone, and Cupid’s bow. You can apply this with your fingers, a sponge, or a brush. - Step 2: Apply a Powder Highlighter
Once your cream or liquid highlighter has settled, layer a powder highlighter on top. Powder highlighters tend to have a more intense shine, so layering them on top of a cream or liquid formula will create a more luminous effect that lasts longer. - Step 3: Blend Well
Be sure to blend everything together to avoid harsh lines and achieve a seamless, glowing finish. A fluffy brush or makeup sponge works best for blending the different textures.
Why it works: Layering different formulas allows for a buildable, customized glow. The cream or liquid products give a soft base, while the powder gives a reflective, long-lasting finish.
- Strobing
Strobing is a technique that focuses entirely on creating radiant, luminous skin by emphasizing areas of natural light reflection. Unlike traditional contouring, which uses bronzers and highlighters to create shadows and highlights, strobing is all about focusing on the highlight.
- How to strobe:
- Apply a dewy primer to create a luminous base.
- Use a liquid or cream highlighter on the high points of your face, including the tops of your cheekbones, brow bones, down the bridge of your nose, and the Cupid’s bow.
- Set with a subtle, shimmer powder highlighter, focusing on the same areas.
- Tip: Avoid matte foundations or powders, as they can dull the glow. Opt for a dewy foundation or a foundation with a radiant finish to maintain the glowing effect.
Why it works: Strobing creates a healthy, lit-from-within look by focusing all attention on the high points of your face, giving you an illuminated, fresh glow.
- Highlighting with a Fan Brush
Using a fan brush for applying highlighter is a technique that can give you a more controlled and precise application. This brush allows you to focus the highlight where you want it most and can help build intensity gradually.
- How to use a fan brush for highlighting:
- Pick up the product lightly with the fan brush, tapping off excess.
- Sweep the brush in a „C” shape along your cheekbones, moving from the top of your cheekbone to your temple.
- Focus on the high points of your face, such as the tops of your cheekbones, the bridge of your nose, and your Cupid’s bow.
- Tip: Fan brushes are great for creating a more natural, diffused glow, but you can also build up the intensity for a more dramatic effect by layering the highlighter.
Why it works: The fan brush allows for a light, airbrushed application that helps prevent over-application of the product. It also makes it easier to achieve a more sculpted, soft glow.
- Using a Pencil Highlighter for Precision
Pencil highlighters are a great tool for targeting specific areas that need a more precise application, such as the inner corners of the eyes, brow bones, or the Cupid’s bow. Pencil highlighters typically come in cream or pencil formats and provide a pop of light to brighten areas of the face.
- How to use a pencil highlighter:
- Apply a pencil highlighter to the inner corners of your eyes to brighten them and create a more awake look.
- Lightly trace along your brow bone to accentuate your arch.
- Highlight your Cupid’s bow for a fuller lip effect.
- You can also apply a pencil highlighter along the lower lash line to give a wide-eyed appearance.
Why it works: Pencil highlighters allow for precision and control, helping you highlight smaller areas of your face with accuracy and definition.
- Highlighting Your Body
Highlighting doesn’t have to be limited to your face—body highlighting has become a major trend for giving your skin a glowing, sun-kissed look, especially for special occasions like weddings or photoshoots.
- How to highlight your body:
- Choose a body highlighter with a shimmer or glitter finish. You can use a liquid highlighter or body oil that has illuminating properties.
- Apply the product to your collarbones, shoulders, the tops of your arms, and the center of your chest.
- Use a makeup sponge or brush to blend the highlighter into your skin for an even, glowing finish.
- Tip: For an extra touch, you can apply the highlighter along your legs and the tops of your feet for a flawless, glowing look that catches the light.
Why it works: Body highlighting helps create a flawless, radiant appearance, perfect for adding dimension to your skin and enhancing its natural glow.
- Multi-Use Highlighter Products
Some highlighters are designed to be multi-functional, working as both face and eye highlighters. These products often come in cream or liquid formulas and can be used on your cheekbones, eyes, lips, and even as a body highlighter.
- How to use multi-use highlighter products:
- Apply to your cheekbones, brow bone, and cupid’s bow for a glowing face.
- Use the same product on your eyelids as an eyeshadow topper or on your brow bone for a radiant finish.
- Dab a little on your lips for a glossy, luminous pout.
Why it works: Multi-use highlighters simplify your routine and ensure your makeup is cohesive. These products provide a radiant glow that lasts all day while keeping your look consistent.
- Customize Your Highlighter Shade
One of the most advanced techniques for highlighting is selecting the right shade of highlighter for your skin tone. Customizing your highlighter can create a more flattering, natural look.
- For Fair Skin: Opt for a highlighter with a soft, pink or pearl tone to enhance your natural glow.
- For Medium Skin: Choose a gold or champagne highlighter for a warm, radiant effect.
- For Dark Skin: Richer, deeper shades of bronze or copper work best, as they highlight the skin beautifully without looking too ashy.
- Tip: You can even mix different highlighter shades to create a customized glow that works with your complexion.
Why it works: Using the right shade of highlighter enhances your natural undertones, creating a glow that looks natural and flattering on your skin.
Conclusion
Advanced highlighting techniques can elevate your makeup routine by giving your skin a stunning, multidimensional glow. Whether you’re layering different highlighter formulas, experimenting with strobing, or perfecting the application with the right tools, these techniques can help you achieve a radiant, sculpted look. By selecting the right highlighter products for your skin tone, and using precise application techniques, you’ll be able to create a glowing complexion that lasts all day. Happy highlighting!


